
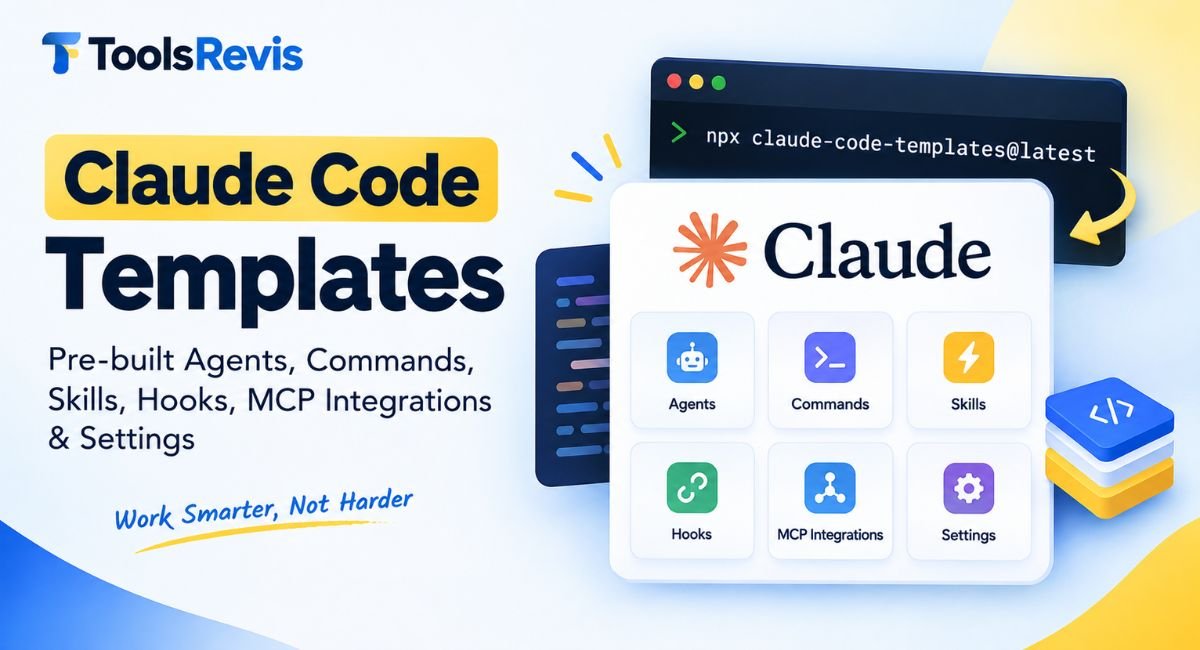
Copy-pasting the same permission setup into Claude Code for the fifth project this month?
Someone already built that exact config — you just need to know where to find it.
npx claude-code-templates@latest. They save setup time, but vet community templates before installing since they run with your permissions.
Introduction
Every new Claude Code project starts the same way: you write a CLAUDE.md file, configure permissions, maybe wire up an MCP server, and repeat instructions you’ve already typed a dozen times before. Claude code templates exist to skip that repetition. Instead of building your workspace from scratch, you install ready-made claude code commands, skills, agents, and settings that other developers — or Anthropic itself — have already tested.
This guide maps out the full templates ecosystem: what each component type actually does, where to find trustworthy sources, which starter templates are worth installing first, and how to configure the claude code features around them — workspace setup, permissions, and CLAUDE.md — so your install doesn’t just work, it works safely. If you’re trying to figure out where templates fit into Claude Code’s broader feature set, this is the map.
For a broader look at coding assistants and developer-focused AI software, see our Best AI Tools for Developers guide.
What Are Claude Code Templates? (Skills, Agents, Commands, Hooks, MCP & Plugins)
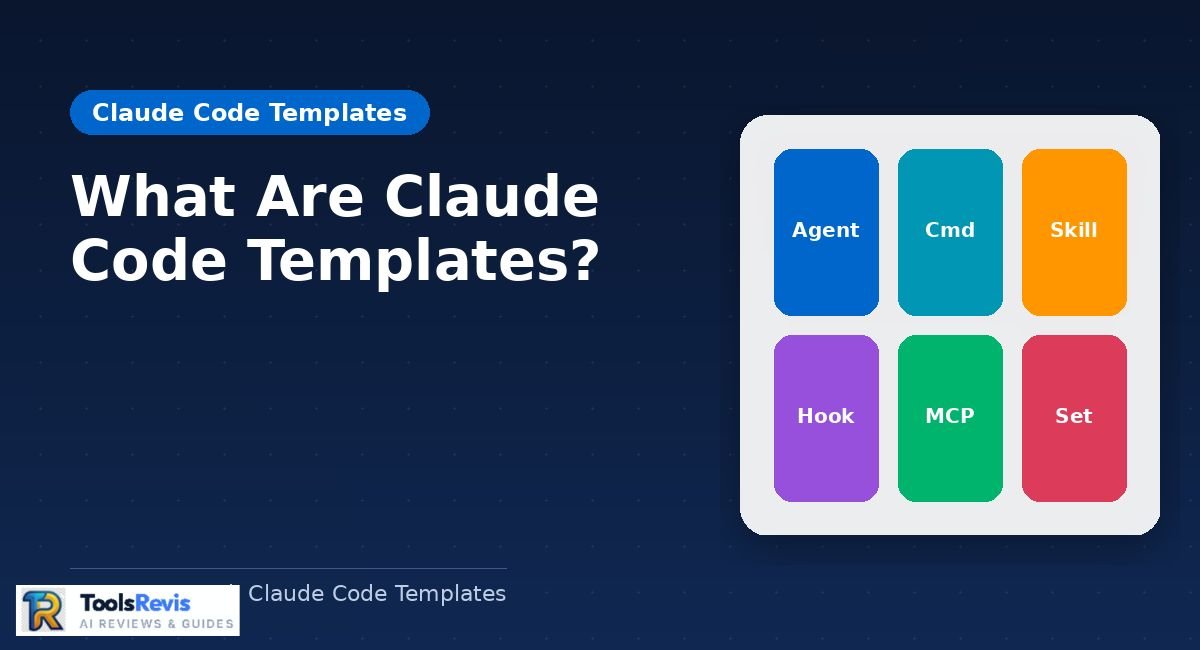
Claude Code templates are reusable configurations and components that add agents, commands, Skills, hooks, MCP integrations, and settings to Claude Code. Each type lives in its own predictable location and does a distinct job:
- Agents (subagents) — specialized AI personalities with their own system prompt, tool access, and context window, stored as Markdown files in .claude/agents/ (project) or ~/.claude/agents/ (personal). Claude delegates matching tasks to them automatically, or you can invoke one directly.
- Commands — custom slash commands (like /generate-tests or /check-security) that trigger a specific, user-invoked action.
- Skills — packaged expertise in a SKILL.md file plus optional scripts, which Claude decides to use on its own based on your request and the Skill’s description. This is the key difference from commands: Skills are model-invoked, commands are user-invoked.
- Hooks — automation triggers that run at specific events, like validating code before a commit or running a script after Claude finishes a task.
- MCP integrations — connections to external services (GitHub, PostgreSQL, Stripe, Slack) that give Claude access to live data and tools outside your codebase.
- Settings — configuration presets for things like permission defaults, timeouts, and output styles.
Individually, these live as files. Bundled together, they become a plugin — installed as one unit from a marketplace, which is simply a cataloged repository of plugins.
All of them are file-based by design: a template is just a Markdown or JSON file with the right frontmatter, sitting in the right folder. That’s what makes them shareable — copy the file, commit it to a repo, or install it with one command, and the configuration travels with it.
Claude Code Templates vs CLAUDE.md — What’s the Difference?
CLAUDE.md is a single memory file Claude reads automatically at the start of every session; templates are separate, purpose-built components you install individually and Claude uses only when relevant. CLAUDE.md holds persistent, always-loaded context — your project’s architecture notes, coding conventions, or “we use pnpm, not npm” reminders. It’s passive: everything in it enters Claude’s context whether or not the current task needs it.
Templates work differently depending on type. An installed Skill or agent isn’t loaded into every conversation — Claude (or you, for commands) decides when to invoke it, based on the task at hand. This distinction trips up a lot of newcomers: if you’re wondering why installing agents everywhere didn’t change Claude’s baseline behavior the way editing CLAUDE.md would, it’s because templates are on-demand tools, not standing instructions. In practice, most real projects use both — a lean CLAUDE.md for context Claude always needs, plus targeted templates for capabilities it needs only sometimes.
Best Claude Code Templates to Get Started

The best Claude Code templates to start with are a project CLAUDE.md template, a feature-development agent, and a testing command because they cover common development workflows. These six templates cover the workflows almost every project needs, and each one below is something you can copy directly into your project.
Basic Project Template
This is a minimal .claude/settings.json starting point — safe defaults with no aggressive auto-permissions, meant to be layered on before you add anything else.
json
{
“permissions”: {
“defaultMode”: “default”,
“allow”: [“Read”, “Grep”, “Glob”]
}
}
Drop this in a fresh project’s .claude/ folder before adding agents, commands, or hooks. It keeps Claude in read-only mode until you’ve reviewed what else you’re installing — useful precisely because the templates you add next will often request broader permissions of their own.
CLAUDE.md Project Template
A good starting CLAUDE.md is short and structural, not exhaustive — it tells Claude what the project is, how it’s built, and what not to touch, rather than trying to document everything.
markdown
# Project: [Name]
## Stack
– Language/framework:
– Package manager: (e.g. pnpm, not npm)
– Test runner:
## Conventions
– Commit style:
– Branch naming:
## Do Not
– Never edit files in /generated
– Never commit directly to main
Keep it under a page. CLAUDE.md loads into every session automatically, so bloating it wastes context Claude could otherwise spend on your actual task.
Feature Development Template
A feature-development agent template narrows Claude’s focus to planning-then-implementing a single feature, instead of letting the main conversation sprawl across exploration, edits, and testing at once.
markdown
—
name: feature-builder
description: Use when implementing a new feature end-to-end, from plan to working code.
tools: Read, Write, Edit, Bash, Grep, Glob
model: sonnet
—
You are a feature-implementation specialist. When given a feature request:
1. Read relevant existing code before writing anything.
2. Propose a short implementation plan.
3. Implement in small, testable increments.
4. Run existing tests after each change.
Save this as .claude/agents/feature-builder.md. Because it runs in its own context window, it keeps exploration noise out of your main conversation.
If you’re comparing Claude’s current models for coding work, our Claude Sonnet 5 Review covers its capabilities and developer-focused use cases.
Testing Template
A testing-focused custom command turns “write tests for this” from a re-typed instruction into a one-word slash command that enforces your team’s testing conventions every time.
markdown
—
description: Generate tests for the current file or specified module
—
Write tests for $ARGUMENTS following these rules:
– Match the existing test framework and file naming convention
– Cover edge cases, not just the happy path
– Do not modify the implementation file
Save as .claude/commands/generate-tests.md, then run /generate-tests path/to/file.js.
Research Template
A research-mode agent restricted to read-only tools is useful precisely because it can’t accidentally edit anything while it’s exploring a codebase or evaluating an approach.
markdown
—
name: researcher
description: Use for codebase exploration, comparing approaches, or answering “how does X work” questions.
tools: Read, Grep, Glob, WebSearch
model: haiku
—
You investigate and report. Never edit files. Summarize findings with file:line references.
Pairing this with Plan Mode (a built-in permission mode, not a template) gives you a fully read-only research pass before any code changes happen.
Custom Claude Code Command Template
Building your own claude code custom command just means writing a Markdown file with a description field and a prompt body — no plugin system or special tooling required to get started.
markdown
—
description: Short description shown in /help
argument-hint: [optional argument format]
—
Your instruction to Claude goes here. Reference user input with $ARGUMENTS.
Anything saved in .claude/commands/ becomes available immediately — check /help to confirm it’s listed. Project-level commands (.claude/commands/) are shared via git with your team; personal ones (~/.claude/commands/) are just for you.
Want to improve your code after working with Claude Code? Try our free browser-based code optimization tool.
Try Advanced Code Optimizer →Where to Find Claude Code Templates

The main places to find Claude Code templates are community catalogs, GitHub repositories, and Anthropic’s official plugin resources. Here’s how the main sources actually compare, since no other guide currently puts them side by side.
| Source | What it offers | Free/Paid | Vetted or community |
| aitmpl.com | Browsable web catalog, one-command install | Free | Community-sourced, curated by maintainer |
| GitHub (davila7/claude-code-templates) | Full source, 100+ agents/commands/hooks/MCPs/skills | Free, MIT | Community-sourced |
| Anthropic demo marketplace | Small set of official example plugins | Free | Anthropic-maintained |
| Third-party marketplaces (claude-market, bymax.claude-code, etc.) | Niche or opinionated plugin bundles | Free | Community, varies widely in quality |
aitmpl.com — Community Marketplace (npx claude-code-templates@latest)
aitmpl.com is a web-based catalog that lets you browse agents, commands, MCPs, hooks, settings, and Skills visually, then install any of them with a single npx command. Run it interactively with:
bash
npx claude-code-templates@latest
Or install a specific component directly, without opening the browser at all:
bash
npx claude-code-templates@latest –agent development-tools/code-reviewer –yes
Beyond the catalog, the same CLI ships an analytics dashboard, a conversation monitor, and a health-check tool for your Claude Code install — bonus utilities that are easy to miss if you only think of this project as a template list. Documentation lives separately at docs.aitmpl.com.
GitHub Repo (davila7/claude-code-templates) — Verified Current Stats
The project behind aitmpl.com is the open-source repository davila7/claude-code-templates, MIT-licensed, with roughly 28,000 GitHub stars and 2,900 forks as of this writing. It aggregates components from several attributed sources — including Anthropic’s own official skills repo, a 139-skill scientific collection, and multiple community skill/agent libraries — rather than being a single author’s work end to end. That aggregation is exactly why the safety guidance later in this guide matters: quality varies by original source even within one catalog.
Caution: install only from the npm package claude-code-templates and the official repo. Typosquatted package names and unofficial mirror domains do exist in this space; they’re not maintained by the project author.
If you also want to understand how Claude Code itself is licensed and what “open source” actually means here, see our Is Claude Code Open Source? guide.
Official Anthropic Claude Plugins (Vetted, Smaller Catalog)
Anthropic maintains its own demo plugins marketplace with example plugins showing what the plugin system supports — smaller than the community catalog, but directly maintained by Anthropic rather than aggregated from third parties. Unlike Anthropic’s built-in official marketplace, this demo one has to be added manually:
bash
/plugin marketplace add anthropics/claude-code
/plugin
The /plugin command opens a tabbed interface — Discover, Installed, Marketplaces, and Errors — for browsing and managing anything you’ve added, from any source, not just this one.
Other Marketplaces (Community Options)
Beyond aitmpl.com, a growing number of independent marketplaces package plugins around a specific opinion or niche — for example, curated collections focused on strict quality gates and phased planning workflows, or infrastructure-and-DevOps-specific bundles. Directory sites have also started cataloging these smaller marketplaces so you can compare plugin counts and update recency before adding one. These are worth exploring once you’ve outgrown the general-purpose catalog, but they typically have far fewer eyes on them than the main repo, so the vetting checklist later in this guide applies even more here.
Claude Code Skills Explained: Skills vs Agents vs Plugins
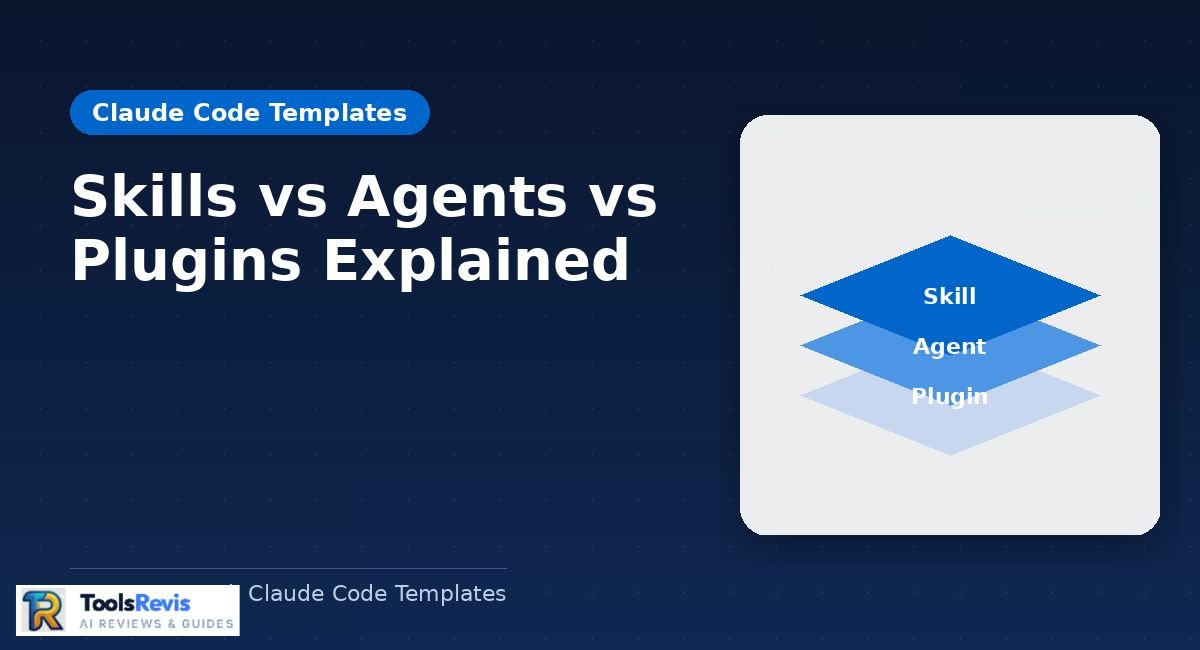
Skills add reusable instructions, agents handle isolated tasks, and plugins package multiple Claude Code components for installation and distribution. They overlap enough to confuse newcomers, so here’s how each actually works.
What Are Claude Code Skills?
A Claude Code Skill is a reusable set of instructions and supporting files that Claude can load when a task matches the Skill’s purpose. Skills are model-invoked: you don’t type a command to trigger one, Claude decides based on your request and the Skill’s description field, which is why writing a clear, specific description matters more than almost anything else in the file. This is the core distinction from slash commands, which are user-invoked — you explicitly type /command to run them.
Skills come from three places, each with a different scope:
- Personal Skills — ~/.claude/skills/, available across all your projects
- Project Skills — .claude/skills/ inside a repo, shared with your team via git
- Plugin Skills — bundled inside an installed plugin, working identically to the other two once installed
How to Use Skills in Claude Code
To use a Claude Code Skill, install it in the appropriate Skills directory and let Claude load it when the request matches its description. To create one yourself, add a directory containing SKILL.md with YAML frontmatter (name and description) plus a Markdown body of instructions:
markdown
—
name: my-skill
description: Use when [specific trigger]. Handles [specific capability].
—
Instructions Claude follows when this Skill is invoked…
The description field is doing the real work here — Claude Code requires version 1.0 or later for Skills support, and a vague description (“helps with documents”) gets ignored far more often than a specific one (“use when creating or editing .docx files with tracked changes”).
Claude Code Skills vs Agents
The practical difference is scope: a Skill adds a capability to the current conversation, while an agent (subagent) spins up an entirely separate conversation with its own context window, tool restrictions, and system prompt. Subagents preserve your main conversation’s focus by keeping exploration and implementation elsewhere, enforce constraints by limiting exactly which tools they can touch, and can even route to a cheaper model like Haiku for lower-stakes work. Claude Code ships several built-in subagents — Explore, Plan, and general-purpose among them — and you can write custom ones as Markdown files with YAML frontmatter in .claude/agents/ (project) or ~/.claude/agents/ (personal, lower priority when names conflict).
A rough rule of thumb: reach for a Skill when you want Claude to know how to do something within the existing conversation; reach for an agent when you want the task handled in an isolated context, with its own tool boundaries, separate from what you’re currently discussing.
Skills vs Plugins
A Skill is one type of component; a plugin is a packaging format that can contain Skills, agents, commands, hooks, and MCP servers together, installed and versioned as a single unit. If you’re only sharing one focused capability, a standalone Skill in a git repo is simpler. If you’re distributing a full workflow — say, a testing setup with a custom agent, a slash command, a pre-commit hook, and the Skill that ties them together — a plugin is the right container, since it installs everything in one step via a marketplace.
Official Claude Plugins
Anthropic’s official plugins come from a small, Anthropic-maintained demo marketplace, distinct from the large community catalog at aitmpl.com, and are added manually with /plugin marketplace add anthropics/claude-code. They’re worth starting with specifically because they’re maintained directly by Anthropic rather than aggregated from multiple community authors — fewer options, but a shorter trust chain. For everyday component-by-component installs, though, most developers end up pulling primarily from the larger community catalog once they’ve confirmed the basics work.
Useful Claude Code Skills You Should Try
Beyond the six starter templates, a handful of individual Skills are worth installing on their own merit — either because they’re widely adopted or because they solve a specific, recurring pain point cleanly. Here are five worth knowing about.
If you’re specifically interested in frontend work, see our Claude Code Frontend Design Skill guide for how Anthropic’s frontend design Skill changes Claude’s approach to UI development.
Claude PPTX Skill
The pptx Skill — part of Anthropic’s official document-processing set and bundled into the aitmpl.com catalog — lets Claude read, create, and edit PowerPoint files directly, including template-based editing and generating decks from scratch. It handles text extraction via markitdown, visual thumbnails for reviewing a deck without opening PowerPoint, and two distinct workflows depending on whether you’re editing an existing template or building a new presentation with pptxgenjs. Install it with:
bash
npx claude-code-templates@latest –skill pptx –yes
Because it’s one of Anthropic’s own official Skills (also available natively in claude.ai and the API), it’s a safe first pick if you’re testing whether Skills are worth adding to your workflow at all.
Document Suite Claude Skill
“Document Suite” isn’t a single bundled product — it refers to four separate official Anthropic Skills (docx, xlsx, pptx, and pdf) that happen to work well installed together. Anthropic’s official document skills — docx, xlsx, pptx, and pdf — work as a matched set, so if you’re regularly moving between Word, Excel, PowerPoint, and PDF files, installing all four gives Claude consistent editing, creation, and extraction behavior across every format. Each follows the same progressive-disclosure pattern: a lightweight SKILL.md loads first with metadata, then fuller documentation and reference files (like ooxml.md for pptx or FORMS.md for pdf) load only when the task actually needs them, keeping context usage efficient even with all four installed at once.
Claude Code Brainstorm Skill
The brainstorming Skill forces a structured design conversation before any code gets written, asking one focused question per turn about purpose, constraints, and success criteria instead of letting Claude jump straight to implementation. It’s one of the more widely installed community Skills in the aitmpl.com catalog, delivering its design output in short, confirmed sections — architecture, then components, then data — rather than one long unreviewed plan. Useful specifically when you’re prone to letting Claude start coding before the actual requirements are pinned down.
bash
npx skills add davila7/claude-code-templates –skill brainstorming
Code Simplifier Claude
Several community-maintained “code simplifier” Skills exist across different repositories, each packaging a refactoring rulebook — one popular version walks through dozens of specific rules across categories like readability, dead code, and naming, applied only to code you’ve recently touched rather than an entire codebase. The pattern is consistent across implementations: clean up structure and clarity without changing behavior. Because these come from several different independent authors rather than one canonical source, check the specific repository’s rule set before installing to confirm it matches your team’s style conventions.
Framer + Claude Code
Framer connects to Claude Code natively through its own MCP server, giving Claude direct read/write access to your Framer canvas, components, and CMS content without a separate plugin marketplace step. Once connected, you can ask Claude to rewrite page copy, build custom React components and insert them straight into the canvas, or export Framer components as production-ready code. Community Skills built on top of this connection — a “Framer Expert” Skill is one example — add deeper guidance on Framer Motion animations and interactive prototyping on top of the base MCP capabilities.
Claude Code Workspace & Global CLAUDE.md Setup
A Claude Code workspace is the project directory Claude Code works in, together with its configuration, memory files, permissions, and trust settings.
What Is a Claude Code Workspace?
A Claude Code workspace is the directory where Claude Code runs and the project configuration and memory files associated with that directory. The first time you run claude in a new directory, you’ll see a trust prompt — accurate but worth taking seriously, since saying yes also means silently loading any .claude/settings.json the repository ships with, including whatever permissions or hooks it defines. For a repo you didn’t write yourself, it’s worth a quick look at that settings file before confirming trust.
Project-Level CLAUDE.md
Project memory lives in ./CLAUDE.md or ./.claude/CLAUDE.md, is checked into source control, and is shared with your whole team — this is where architecture notes, coding standards, and common workflows belong. Claude Code reads memory recursively: starting from your current directory, it walks upward (not including the filesystem root) and loads every CLAUDE.md or CLAUDE.local.md it finds along the way. In a monorepo, that means running Claude Code from foo/bar/ picks up both foo/bar/CLAUDE.md and foo/CLAUDE.md automatically — useful for shared root-level conventions plus package-specific detail lower down.
Two fast ways to add to it during a session:
- Start any message with # to append it as a memory entry
- Run /memory to open the file directly in your system editor
Note that CLAUDE.local.md — once used for personal, uncommitted project preferences — is now deprecated in favor of @path/to/import syntax inside CLAUDE.md, which works better across git worktrees. To pull in a personal file that isn’t checked into the repo, import it directly:
markdown
# Individual Preferences
– @~/.claude/my-personal-notes.md
Global CLAUDE.md Setup
User memory in ~/.claude/CLAUDE.md applies across every project you touch, making it the right place for durable personal preferences — coding style, tooling shortcuts — that shouldn’t be repeated project by project. Claude Code’s full memory hierarchy has four levels, loaded in this order (higher levels take precedence and load first): enterprise policy (organization-wide, IT-managed), project memory, user memory, then the deprecated project-local file. Keep the global file lean — anything in it loads into every single session’s context whether that session needs it or not, so it’s the wrong place for project-specific detail.
ClaudeAgentOptions (for SDK/API Developers)
If you’re building on top of Claude Code programmatically rather than using the CLI directly, the Claude Agent SDK (Python and TypeScript, formerly the Claude Code SDK) exposes a ClaudeAgentOptions object that configures the same agent loop, tools, and context management under the hood — things like allowed_tools, a custom system_prompt, and permission handling, set in code instead of through .claude/ files. This is a distinct, code-level configuration surface from the templates covered elsewhere in this guide, relevant mainly if you’re embedding Claude’s agent loop inside your own application rather than running claude in a terminal.
If you’re setting up Claude Code from scratch, our Claude Code in Terminal guide covers installation and terminal setup step by step.
Best Workspace Configuration Practices
Settings apply in a strict precedence order — enterprise managed policies first (cannot be overridden), then command-line arguments, then local project settings (.claude/settings.local.json, personal and gitignored), then shared project settings (.claude/settings.json, committed), then user settings (~/.claude/settings.json) last. A few practices follow directly from that ordering:
- Put team-wide rules in .claude/settings.json (committed) and personal overrides in .claude/settings.local.json (gitignored) — never the reverse.
- Keep both CLAUDE.md and settings.json scoped to what’s genuinely shared; personal preferences belong in your global ~/.claude/ files, not the project repo.
- Review a new repo’s .claude/settings.json before accepting the trust prompt — it can define hooks and expanded permissions that take effect the moment you say yes.
- Use @import syntax in CLAUDE.md instead of CLAUDE.local.md for anything personal that shouldn’t be committed.
Claude Code Permission Modes & Settings Templates
Permission modes control how much Claude Code can do before it stops and asks you first — and choosing the right one, with the right settings template underneath it, is what determines whether Claude Code feels cautious or effortless day to day.
What Are Claude Code Permission Modes?
Claude Code permission modes control which actions Claude can perform automatically and which actions require your approval. Claude Code ships four main modes, each trading convenience for oversight differently:
| Mode | What Claude can do without asking | Best for |
| default | Read files | Starting out, sensitive work |
| acceptEdits | Read and edit files | Iterating on code you’re reviewing |
| plan | Read files only, no execution | Exploring a codebase, planning a refactor |
| auto | All actions, with background safety checks | Long-running tasks, reducing prompt fatigue |
Note: Auto mode shipped as a research preview (March 2026). It uses a two-stage safety classifier to approve or flag actions instead of prompting you directly — Anthropic has stated the classifier alone isn’t sufficient for high-risk actions, so treat it as still maturing rather than a fully hands-off mode.
A fifth option, bypassPermissions, skips every prompt entirely and only appears if you explicitly start a session with –permission-mode bypassPermissions (or the equivalent –dangerously-skip-permissions flag) — it’s intentionally excluded from the normal mode cycle so you can’t switch into it by accident.
Set the starting mode as a CLI flag:
bash
claude –permission-mode plan
Or as a default in your settings file:
json
{
“permissions”: {
“defaultMode”: “acceptEdits”
}
}
During a session, cycle through modes with Shift+Tab. Telling Claude to “stop asking for permission” in chat does nothing — mode changes only happen through the UI, CLI flags, or settings files.
Using /permissions and Auto-Allow
Claude Code’s `permissions.allow` and `permissions.deny` lists let you pre-approve or block specific tools and commands. A typical allow-list entry looks like this:
json
{
“permissions”: {
“defaultMode”: “default”,
“allow”: [“Bash(npm test:*)”, “Bash(git diff:*)”],
“deny”: [“Bash(rm -rf:*)”]
}
}
Precedence matters here: local project settings (.claude/settings.local.json) override shared project settings (.claude/settings.json), which override user settings (~/.claude/settings.json) — so a command allowed in your personal local file will win over a broader deny rule in your global settings, not the other way around. If you’re seeing unexpected permission denials, check which settings file is actually taking precedence before assuming the allow-list is broken.
Auto Accept All vs Permission Prompts — Which Should You Use?
Use `acceptEdits` when you want Claude to edit files without repeated approval, and use more autonomous modes only when you are comfortable giving Claude broader control. That distinction matters more than it sounds: accept-edits keeps you in the loop for anything that executes on your system, which is usually the higher-risk category. Auto mode, by contrast, is built for long, unattended stretches of work — large refactors, repetitive tasks, background agent runs — where stopping every few seconds for approval defeats the purpose.
The practical guidance: use default or plan mode for unfamiliar codebases or anything security-sensitive, acceptEdits for iterating on code you’re actively reviewing as it changes, and reserve auto (or bypassPermissions) for isolated environments — a container, a disposable branch, a sandboxed VM — where a mistake can’t reach anything you care about. The convenience of fewer prompts is real, but it’s a direct trade against how much of Claude’s work you’re actually reviewing as it happens.
Is It Safe to Install Community Claude Code Templates?

Community Claude Code templates are not automatically safe; their risk depends on the instructions, permissions, hooks, scripts, and MCP connections they contain. This isn’t unique to Claude Code’s ecosystem, but the file-based, git-shareable nature of templates makes it unusually easy to install something you haven’t actually read.
How to Vet a Template Before Installing
Before installing anything from a community source — not just the ones flagged as risky — a quick checklist catches most problems:
- Read the actual file, not just the description. A SKILL.md or agent file is plain Markdown; open it and skim what it instructs Claude to do before installing, especially anything with a tools field granting Bash or Write access.
- Check scoped permissions. Does the template request broader tool access than its stated purpose needs? A documentation-generator agent asking for unrestricted Bash access is a mismatch worth questioning.
- Check recent maintenance. A repo with recent commits and an active issue tracker is more likely to have caught problems than one that’s been untouched for a year.
- Review any hooks or MCP connections specifically. Hooks run automatically at defined trigger points without you invoking them — that automation is exactly what makes a malicious hook more dangerous than a malicious command you’d have to run yourself.
- Install from the canonical source. Stick to the verified npm package and GitHub repo for a project rather than similarly-named forks or mirror domains, which aren’t held to the same review standard as the original.
None of this requires deep security expertise — it’s the same “read before you run” habit you’d apply to any script you found online, just applied consistently to templates because they’re so easy to install without reading.
Common Mistake: Installing Too Many Skills/Agents at Once
Installing a large batch of Skills at once, before you’ve confirmed each one’s description is specific and non-overlapping, is a common way to get Claude invoking the wrong Skill for a task or ignoring one entirely. Because every installed Skill’s name and description sits in Claude’s context so it can decide when to use them, a pile of vaguely worded or overlapping descriptions makes that discovery step noisier — Claude has more similar-sounding options to choose between, and picks wrong more often. The same logic applies to agents: installing a dozen subagents with broad, similar descriptions makes automatic delegation less predictable than installing three or four with sharply distinct purposes.
The practical fix is incremental adoption: install one or two templates at a time, confirm they trigger correctly for the tasks you expect, and only then add more. This is also why generic descriptions (“helps with code”) tend to underperform specific ones (“use when refactoring functions over 50 lines for readability”) — precision in the description field is what keeps a growing Skill collection usable rather than confusing.
Do You Need a Paid Claude Plan to Use Templates?
Claude Code templates can be free to download, but using Claude Code itself depends on the Claude plan and access level you have. According to Anthropic’s official pricing page, Free tier covers chat, code generation and web search, but Claude Code is listed specifically as part of what Pro adds on top of Free — “Access Claude Code on the web and in your terminal.” That’s a distinction worth being precise about: the templates are open-source and cost nothing to download, but the tool they extend isn’t available on the free plan.
Here’s where the tiers land as of this writing:
| Plan | Price | Claude Code access |
| Free | $0 | Not included |
| Pro | $17–20/mo | Included |
| Max (5×/20×) | $100–200/mo | Included, higher usage limits |
| Team Standard | $20–25/seat/mo | Not included (chat/collaboration only) |
| Team Premium | $100–125/seat/mo | Included |
For most individual developers installing a handful of agents and commands, Pro is enough — the jump to Max mainly matters if you’re running Claude Code heavily throughout the day and hitting session limits, independent of how many templates you’ve installed. Since pricing and usage limits are exactly the kind of detail that shifts over time, it’s worth checking claude.com/pricing directly before deciding between Pro and Max. If you’re still weighing the two tiers generally rather than specifically for template usage, a dedicated Claude Pro vs Max comparison goes deeper into the usage-limit math.
FAQ
1. What are Claude Code templates?
Claude code templates are pre-built, file-based components — agents, commands, Skills, hooks, MCP integrations, and settings — that configure Claude Code for a specific workflow without you writing that configuration from scratch. They’re installed individually or in bundles called plugins, most commonly via npx claude-code-templates@latest from the aitmpl.com catalog.
2. How do I create a custom Claude Code command?
Write a Markdown file with a description field in its YAML frontmatter and your instruction as the body, referencing user input with $ARGUMENTS. Save it to .claude/commands/ for a project-level command shared via git, or ~/.claude/commands/ for a personal one available everywhere. It becomes available immediately — check /help to confirm.
3. What is the difference between Claude Code skills and agents?
A Skill adds a capability to your current conversation and is invoked automatically by Claude based on its description; an agent (subagent) spins up a completely separate conversation with its own context window, tool restrictions, and system prompt. Use a Skill when Claude just needs to know how to do something; use an agent when you want a task isolated from your main conversation entirely.
4. Are Claude Code templates free to use?
Yes — templates from aitmpl.com, the davila7/claude-code-templates GitHub repo, and Anthropic’s own demo marketplace are free and mostly open-source (MIT-licensed, in the case of the main community repo). What isn’t free is Claude Code itself, which requires a paid Claude plan.
5. Do I need a paid Claude plan to use Claude Code templates?
You need at least a Claude Pro subscription to use Claude Code at all — the free tier doesn’t include it. The templates you install on top of Claude Code don’t add any separate cost.
6. Where can I find Claude Code templates on GitHub?
The main community source is davila7/claude-code-templates, an MIT-licensed repository with roughly 28,000 stars that aggregates agents, commands, hooks, MCPs, and Skills from multiple attributed contributors, including Anthropic’s own official Skills repo.
7. How do Claude Code permission modes and auto-allow work?
Permission modes (default, acceptEdits, plan, auto) set how much Claude can do without asking, cycled with Shift+Tab or set via permissions.defaultMode in settings. Separately, permissions.allow and permissions.deny lists let you pre-approve or block specific commands by pattern, regardless of which mode is active.
8. Is it safe to install community-made Claude Code templates?
It depends on the specific template — since agents, hooks, and Skills run with your Claude Code permissions, an untrusted one can do anything you can do. Read the actual file before installing, check what tool access it requests, favor actively maintained repos, and install only from canonical sources rather than similarly-named forks.
9. What is the difference between a Claude Code skill and a plugin?
A Skill is one type of component — packaged expertise in a SKILL.md file. A plugin is a distribution format that can bundle Skills, agents, commands, hooks, and MCP servers together, installed and versioned as a single unit through a marketplace. Use a standalone Skill for one focused capability; use a plugin when you’re distributing a full workflow.
Read Next

I’m Umair Ahmad, founder of ToolsRevis. I personally test every AI tool we cover — signing up, running real workflows, checking pricing tiers, and comparing outputs — before writing a single word. My goal: cut through AI marketing hype with honest, hands-on verdicts.
Let’s achieve more together!