

Your first claude command shouldn’t require three Stack Overflow tabs and a prayer. It usually takes one line — the trick is knowing which one applies to your setup.
Install Claude Code with
curl -fsSL https://claude.ai/install.sh | bash
on macOS/Linux or
irm https://claude.ai/install.ps1 | iex
on Windows PowerShell. The free plan doesn’t include Claude Code; use Pro, Max, Team, Enterprise, or Console, then run
claude
.
Claude Code in the terminal is Anthropic’s command-line coding agent — you type a request in plain English inside your project folder, and it reads your files, writes code, runs commands, and shows you diffs before committing to changes. That’s different from the desktop app or the VS Code/JetBrains extensions, which wrap the same underlying agent in a GUI or editor panel instead of a raw shell prompt.
If you’re also wondering whether Claude Code’s licensing affects how freely you can use or modify it, is Claude Code open source covers that before you go further.
This guide is written for two overlapping audiences: developers who want the fastest path from curl to a working session, and non-coders who’ve heard Claude Code can help with scripts or automation but have never opened a terminal before. Either way, you’ll get a working install, know how to fix the errors that actually show up in practice (command not found, regional blocks, PATH issues), understand how permission modes control what Claude can touch without asking, and see how the terminal compares to VS Code and the desktop app so you’re not guessing which interface fits your workflow.
The primary keyword here — claude code in terminal — covers all of that: installation, first run, and the day-to-day mechanics of using it from a shell.
Before You Install: Requirements & What You’ll Need
Claude Code needs a supported OS, a paid Claude plan, and — only if you’re using the older npm install method — a recent Node.js version. Here’s the exact checklist so you don’t hit a wall halfway through setup.
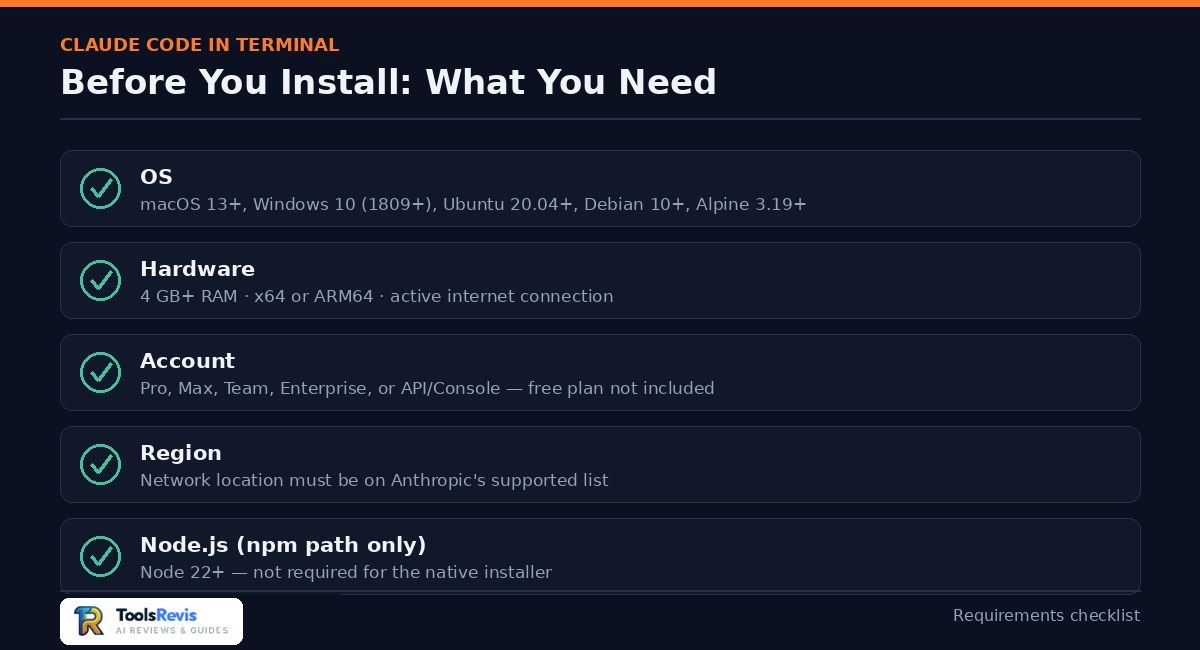
Operating system:
- macOS 13.0 or later
- Windows 10 (build 1809+) or Windows Server 2019+, native or via WSL
- Ubuntu 20.04+, Debian 10+, or Alpine Linux 3.19+
Hardware and network:
- 4 GB+ RAM, x64 or ARM64 processor
- Active internet connection (Claude Code phones home to Anthropic’s API)
Account:
- A Claude Pro subscription or higher (Max, Team, Enterprise, or an API/Console account billed per token)
- The free Claude.ai plan does not include Claude Code — this trips up a surprising number of people who install successfully and then can’t log in
Node.js — only if you’re using npm:
The native installer (the recommended, default method) doesn’t touch Node.js at all — it downloads a standalone binary. Node only matters if you specifically choose the npm install path, which as of the current release requires Node.js 22 or later. On an older Node version, npm prints a warning but usually still completes the install, since the binary it downloads doesn’t rely on your Node runtime anyway.
Requirements Before Terminal Setup
Quick checklist before you run any install command:
- OS matches one of the supported versions above
- You’re in a supported country or region (checked in detail later in this guide)
- You have (or plan to get) a Pro, Max, Team, Enterprise, or Console account
- If using npm: Node.js 22+ is installed (node -v to check)
- You know whether you’re installing on native Windows, WSL, macOS, or Linux — the commands differ
How to Install Claude Code Across Operating Systems
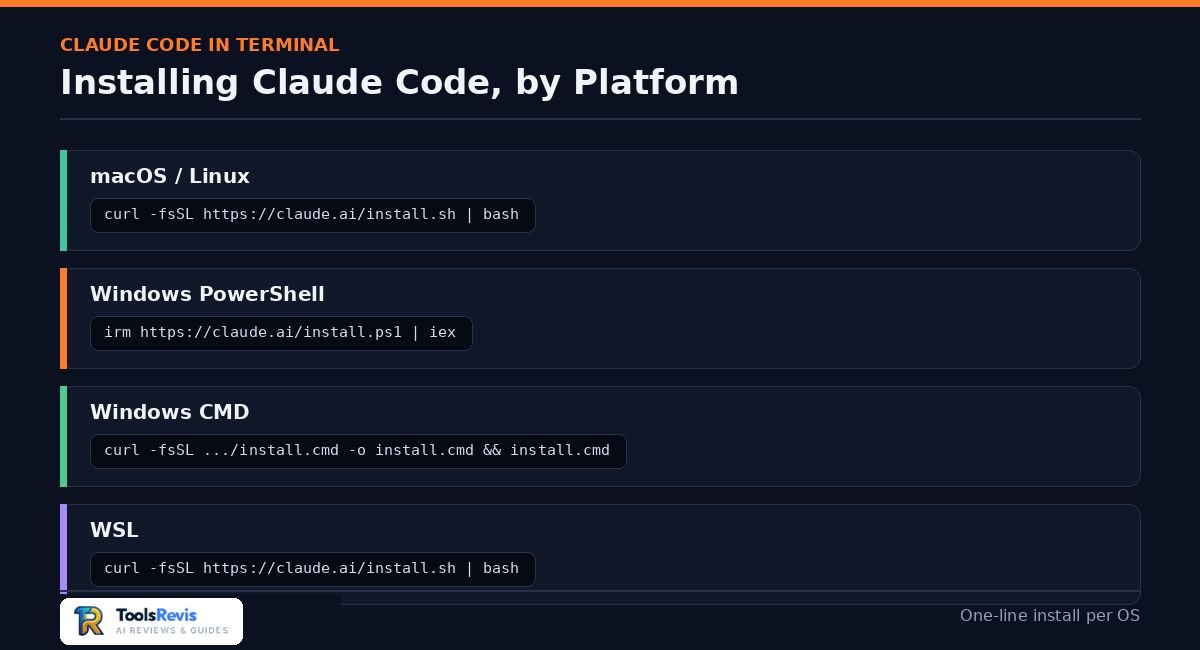
Installing Claude Code in the terminal comes down to one command for your platform, run from any shell. The native installer is the recommended method across macOS, Linux, and Windows — it auto-updates in the background and doesn’t require Node.js.
Install Claude Code on macOS and Linux
The primary, recommended method is the native installer:
curl -fsSL https://claude.ai/install.sh | bash
This works identically on macOS and Linux (including inside WSL). It installs a standalone binary at
~/.local/bin/claude
and keeps itself updated automatically — no separate
claude update
step needed for day-to-day use.
Alternative: Homebrew
brew install --cask claude-code
Homebrew offers two casks worth knowing about:
claude-code
tracks the stable release (roughly a week behind, skips versions with major regressions) and
claude-code@latest
tracks new releases immediately.
brew upgrade claude-code
(or
brew upgrade claude-code@latest)
periodically to stay current, unlike the native installer which updates itself.
Install Claude Code on Ubuntu Linux
The same native installer command works on Ubuntu without modification:
curl -fsSL https://claude.ai/install.sh | bash
If you’d rather manage Claude Code through your system’s package manager, Anthropic also publishes a signed
apt
repository for Debian and Ubuntu, which integrates with your normal
apt upgrade
workflow instead of Claude Code’s built-in auto-updater.
That’s a better fit if you’re provisioning servers or VPS instances and want updates to follow your existing patching schedule rather than happening silently in the background.
Claude Code Has Switched From npm to Native Installer
The native installer is now the default and recommended path — npm is considered the legacy method.
This matters because a lot of older tutorials and Stack Overflow answers still lead with
npm install -g @anthropic-ai/claude-code,
which still works but isn’t the preferred route anymore.
Why the switch?
The native installer ships a standalone binary with no runtime dependency on Node.js, auto-updates itself in the background, and sidesteps a whole category of npm-specific failures — permission errors from global installs,
EACCES
errors, and Node version mismatches.
When you’d still want npm
- CI/Docker images where you’re already managing dependencies through
package.jsonand want version pinning to match your team’s lockfile - Environments without direct network access to claude.ai but that do have npm registry access
- Teams that standardize all tooling installs through npm for consistency
If you do use npm, the command is:
npm install -g @anthropic-ai/claude-code
sudo
— it can create permission problems and security risks. If you hit
EACCES
errors, fix your npm global prefix instead of reaching for
sudo.
Install Claude Code on Windows (PowerShell & WSL)
Windows has two distinct install paths, and mixing them up is a common source of confusion — installing in PowerShell does not make
claude
available inside WSL, and vice versa. They’re separate environments with separate installs.
Native Windows — PowerShell
irm https://claude.ai/install.ps1 | iex
Native Windows — CMD fallback
curl -fsSL https://claude.ai/install.cmd -o install.cmd && install.cmd && del install.cmd
'irm' is not recognized,
you’re actually in CMD, not PowerShell — use the CMD command instead.
If you get The token '&&' is not a valid statement separator,
you’re in PowerShell — use the irm command instead.
Your prompt gives it away: PowerShell shows
PS C:\,
while CMD shows just
C:\.
Optional: Git for Windows
You don’t need it to install or run Claude Code, but installing it lets Claude Code use Git Bash for its Bash tool. Without Git for Windows, Claude Code falls back to using PowerShell to run shell commands instead — which works fine for most tasks, but Git Bash gives you closer-to-Linux command compatibility if you’re used to Unix-style shell syntax.
WSL
Open your WSL distribution’s terminal and run the exact same Linux/macOS installer command from inside it:
curl -fsSL https://claude.ai/install.sh | bash
You install and launch
claude
from inside the WSL shell — not from PowerShell or CMD.
If you install natively on Windows and then open WSL expecting
claude
to already be there, it won’t be. They’re two separate installs that happen to live on the same physical machine.
How to Verify Your Terminal Installation
Confirm the install worked before doing anything else:
claude --version
A working install prints a version number. If this fails, jump to the command-not-found section below.
Then start your first session by running
claude
from inside a project directory. On first run, it opens your browser for a login flow — log in with the same account tied to your Pro, Max, Team, or Console subscription.
Run a deeper health check
claude doctor
This prints diagnostics on your install and settings without starting a session — useful if something feels off but doesn’t throw a clear error.
Fix “Claude: Command Not Found” Error
The claude: command not found error almost always means the install succeeded but your current terminal session doesn’t know where to find it yet. This is by far the most common post-install complaint, and it’s fixable in under a minute.
Why Is the claude Command Not Found in Terminal?
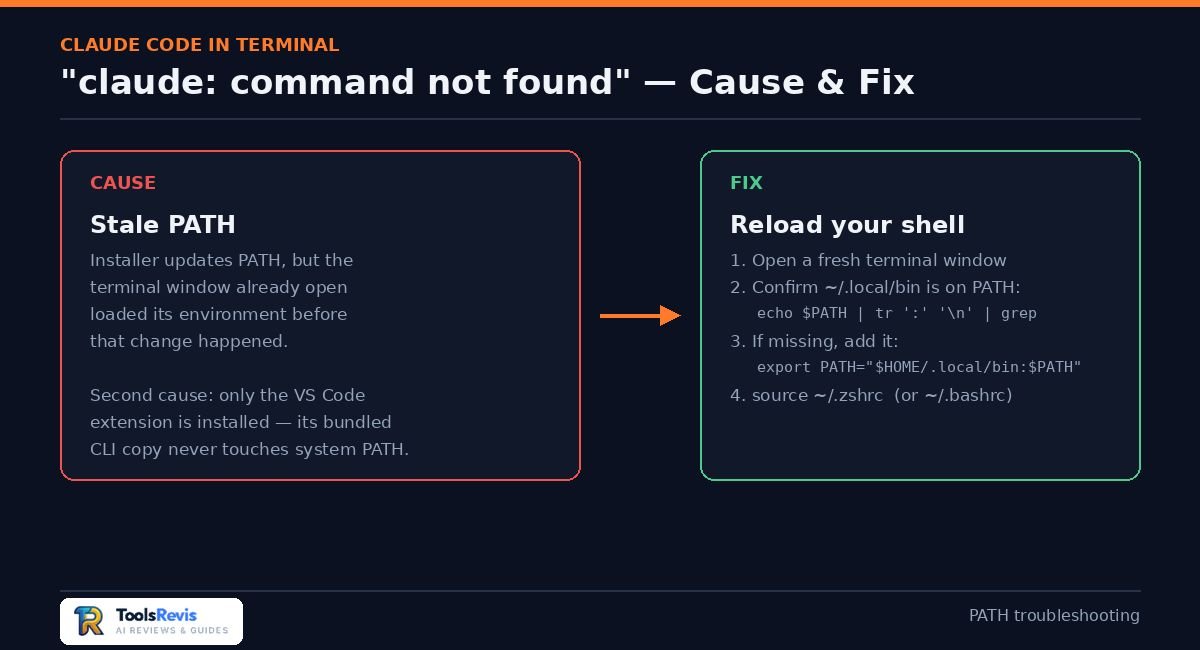
The root cause is a stale PATH: the installer adds claude to your PATH, but the terminal window you’re already using loaded its environment before that change happened, so it doesn’t see the update. Opening a fresh terminal window — or reloading your shell config — fixes it in most cases.
A second, less obvious cause: if you only installed the VS Code extension rather than the standalone CLI, that extension bundles its own private copy of claude for its chat panel, but it doesn’t add anything to your system PATH. If you’ve only ever used Claude Code inside VS Code and now expect claude to work in a plain terminal, run the standalone installer separately — the extension alone won’t get you there.
Fix Path Issues on macOS & Linux
First, check whether the install directory is actually on your PATH:
bash
echo $PATH | tr ‘:’ ‘\n’ | grep -Fx “$HOME/.local/bin”
If nothing prints, it’s missing. Add it manually:
bash
# zsh (macOS default)
echo ‘export PATH=”$HOME/.local/bin:$PATH”‘ >> ~/.zshrc
source ~/.zshrc
# bash
echo ‘export PATH=”$HOME/.local/bin:$PATH”‘ >> ~/.bashrc
source ~/.bashrc
The tilde trap: if you write export PATH=”~/.local/bin:$PATH” with the tilde inside quotes, it won’t expand to your home directory — shells only expand ~ when it’s unquoted or at the start of an unquoted word. Use $HOME instead of ~ inside quoted strings to avoid this exact, easy-to-miss bug.
Fix Terminal Execution Errors on Windows
The most common Windows mistake is running the wrong shell’s install command in the wrong shell — using irm (a PowerShell cmdlet) inside CMD, or && chaining (CMD syntax) inside PowerShell. Check your prompt: PS C:\ means PowerShell, plain C:\ means CMD, and each needs its matching command from the install section above.
If installation succeeded but claude still isn’t recognized, verify %USERPROFILE%\.local\bin is on your User PATH environment variable, then close and fully reopen your terminal — PowerShell needs a fresh session to pick up PATH changes, same as macOS/Linux shells. You can set it directly if needed:
powershell
[Environment]::SetEnvironmentVariable(“Path”, $env:Path + “;$env:USERPROFILE\.local\bin”, “User”)
Re-linking the Native Binary / Removing Conflicting Installs
If claude runs but behaves unexpectedly — wrong version, missing features, inconsistent behavior between sessions — you likely have more than one installation competing on your PATH. This happens when people install via npm first, then later switch to the native installer (or vice versa) without removing the old one.
Find every installed copy:
bash
which -a claude
This lists every claude binary in your PATH, in the order your shell will try them. If you see more than one, keep the native installer’s copy at ~/.local/bin/claude (it auto-updates) and remove the others:
bash
# npm global install
npm uninstall -g @anthropic-ai/claude-code
# legacy local npm install
rm -rf ~/.claude/local
Run which -a claude again afterward to confirm only one remains, and claude doctor to verify the install type Claude Code now reports.
Fix “Claude Code Might Not Be Available in Your Country”

This message means your network location — not your account — failed a check against Anthropic’s list of supported regions. It shows up as a connection error during install or first login, and it’s separate from anything wrong with your installation itself.
Understanding Regional Restrictions
Claude Code is only offered in countries and regions on Anthropic’s supported list, covering the API and Claude.ai access it depends on. When you’re outside that list, the install script or login flow detects it via IP-based geolocation and returns a message pointing you to the supported-countries page rather than completing the install or authentication.
This is distinct from a broken install: the binary itself can download and run fine, but authentication or API calls fail because Anthropic’s servers reject requests originating from an unsupported location. You may also see this triggered by carrier-grade NAT, shared public Wi-Fi, or corporate networks that route traffic through an unexpected country, even if you’re physically located somewhere supported.
Checking Account & Region Availability
Before assuming you’re blocked, confirm where you actually stand. Anthropic maintains a dedicated reference for this — check the official supported countries page directly, since it’s updated over time and a screenshot or cached list can go stale within weeks. Note that the API and Claude.ai (which includes Claude Code) are tracked as two related but separately maintained lists, so check the one relevant to how you’re using Claude Code.
If you’re on a supported list but still seeing the error, it’s worth checking whether the issue is actually account-related rather than regional — a 403 error, for instance, can also stem from subscription status or missing account permissions rather than a location block, so don’t assume geography is the cause just because the error message mentions it.
How to Resolve Regional Blocking
If your country isn’t on the supported list, there currently isn’t a legitimate, policy-compliant way to unlock direct access — Anthropic enforces this deliberately, and using tools like VPNs to route around it real risks running against Anthropic’s terms of service and can result in account restrictions if detected. The practical, safe steps are:
- Confirm your actual network location. If you’re traveling or on a VPN/corporate network, your traffic may be exiting through an unsupported country even though you’re physically elsewhere — try a direct, unproxied connection first.
- Check billing details too. If you’re trying to pay for a plan, mismatched billing address or an unsupported card-issuing country can independently block signup, separate from the network-location check.
- Watch for updates to the supported list. Anthropic has expanded regional coverage over time, so a country that’s unsupported today isn’t necessarily permanently excluded.
- Consider API access via a supported reseller path, such as Amazon Bedrock, Google Cloud, or Microsoft Foundry, if your organization already has commercial access to Claude through one of those platforms in your region — this sometimes has different regional coverage than direct Anthropic billing.
If none of that resolves it, the most reliable path is confirming your status directly against the official list rather than relying on secondhand guidance.
Claude Code in Terminal vs VS Code vs Desktop App
The terminal, VS Code/JetBrains, and the desktop app all run the same underlying Claude Code agent — the difference is how much GUI sits on top of it, and each has a real workflow advantage the others don’t fully replace.
Terminal Workflow Benefits
The terminal is the most direct way to run Claude Code — no GUI overhead, and it works anywhere you have shell access, including over SSH to a remote server. That makes it the natural fit for headless environments, CI pipelines, Docker containers, and any workflow where you’re already living in a shell. It’s also the lightest-weight option: nothing to install beyond the CLI itself, and it plays well with tmux, screen, or any terminal multiplexer if you’re running multiple sessions in parallel.
VS Code / JetBrains Integration Benefits
Running Claude Code through the VS Code extension or JetBrains plugin adds an inline diff viewer, so you see proposed changes rendered against your actual file instead of reading a text diff in a terminal pane. It also adds selection-context sharing (highlight code, and Claude knows what you’re referring to), file-reference shortcuts (Cmd+Option+K on Mac, Alt+Ctrl+K on Windows/Linux) to quickly point Claude at a specific file, and automatic diagnostic sharing, so lint and type errors already visible in your editor get passed to Claude without you having to paste them in.
Desktop App Benefits
The desktop app wraps Claude Code in a full GUI — useful if you’d rather avoid the terminal entirely, want native OS notifications when a long task finishes, or need MCP connector management through a visual interface instead of config files. It’s the better starting point for non-coders specifically: you get the same underlying agent without needing to learn shell basics first.
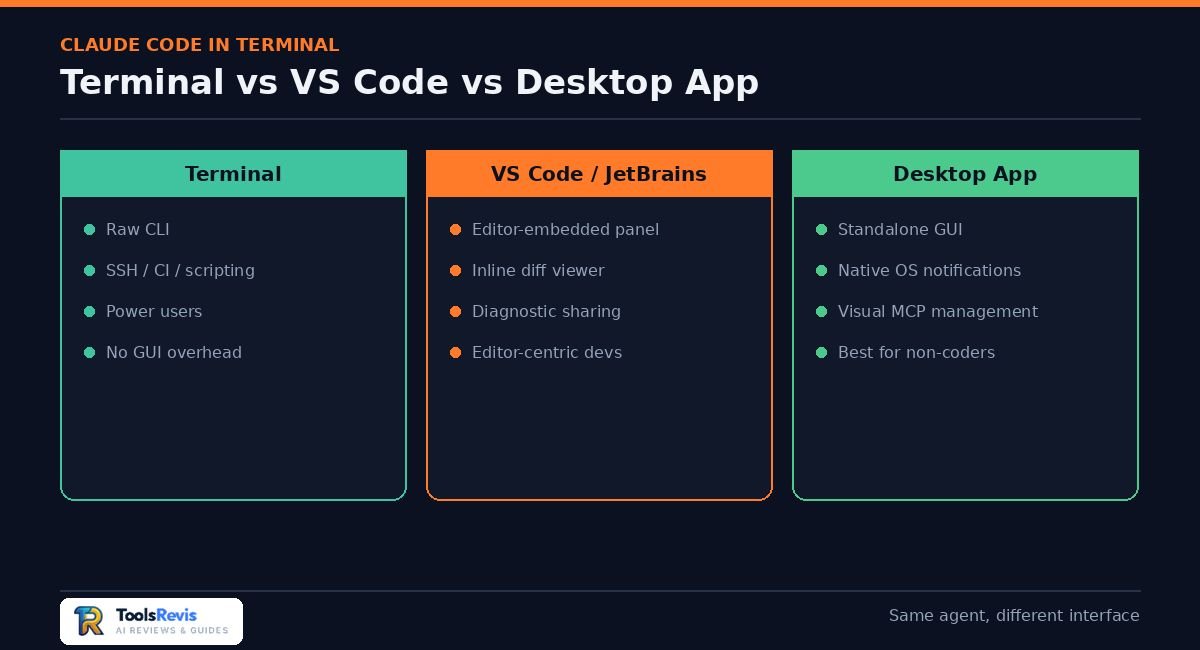
Key Differences (Comparison Table)
| Terminal | VS Code / JetBrains | Desktop App | |
| Interface type | Raw CLI | Editor-embedded panel | Standalone GUI |
| Best for | SSH/remote work, CI, scripting, power users | Developers already living in their editor | Non-coders, visual workflows, notification-driven tasks |
| Notifications | None (terminal-native) | Editor notifications | Native OS notifications |
| Session history | Own session list | Own session list | Own session list |
Worth Knowing — Session History Can Differ Across Interfaces
Starting a task in one Claude Code interface does not necessarily mean the same active session will automatically appear in every other interface. Session history can differ across the terminal, VS Code, and Desktop, but Claude Code provides resume and handoff options such as –resume, /resume, /desktop, and Remote Control depending on your setup.
Practically, if you switch interfaces during a task, don’t assume the new interface will automatically show the same active session. Instead, check whether the session can be resumed or handed off using the options available in your setup.
Which Workflow Should You Pick?
A simple way to decide:
- Pick terminal if you work over SSH, run CI/automation, or want the lightest possible footprint.
- Pick VS Code/JetBrains if you’re already editor-centric and want diffs and diagnostics inline with your code.
- Pick the desktop app if you’re new to the command line, want native notifications, or manage a lot of MCP connectors visually.
None of these are mutually exclusive — many developers use the terminal for quick tasks and VS Code for anything involving heavy back-and-forth review. Just keep the differences in session history and resume options above in mind if you switch mid-task.
Master Claude Code in Terminal Workflows
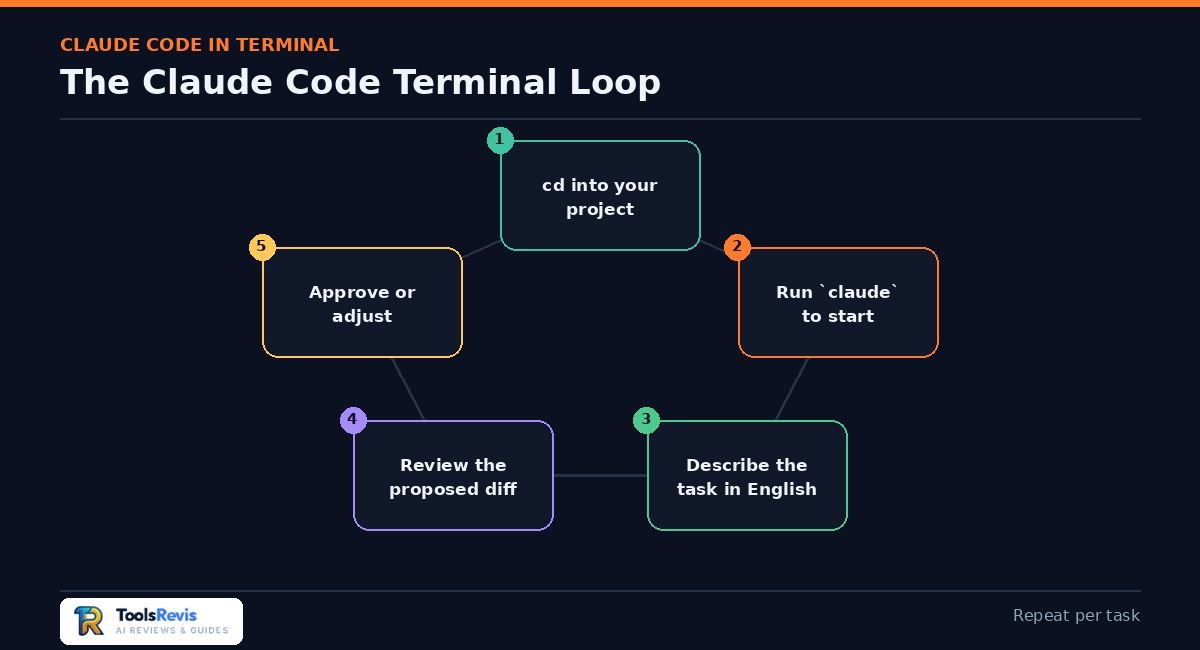
Once installed, using Claude Code in the terminal comes down to a simple loop: start it inside your project, describe what you want in plain language, and review what it proposes before it touches your files.
Starting Claude Code From Your Project Directory
Claude Code reads context from wherever you launch it, so always
cd
into your project folder first, then start a session:
cd ~/projects/my-app
claude
This opens an interactive session scoped to that directory. Starting it from your home folder or a random location means Claude has to guess at context it would otherwise get automatically — always launch it from inside the actual project you’re working on.
Understanding Claude Code’s Project Context
Claude Code automatically reads your project’s file structure, dependency manifests (like package.json, requirements.txt, or Cargo.toml), and existing code conventions the moment you start a session — it doesn’t need you to manually point it at every relevant file. This is how it infers your language, framework, and existing patterns without you explaining your stack from scratch each time.
For anything beyond what it can infer automatically — team conventions, architecture decisions, commands specific to your build process — you supplement this with a CLAUDE.md file in your project root (covered in detail later in this guide). Think of automatic context as “what Claude can figure out by looking,” and CLAUDE.md as “what you need to tell it explicitly.”
Executing Your First CLI Task
A good first task is a low-risk, read-only one that shows you how Claude Code approaches a codebase before you let it write anything:
> explain what this repo does
Claude will read through your file structure, key entry points, and dependencies, then summarize the project back to you. This is a useful sanity check even on projects you already know well — it tells you how accurately Claude is parsing your codebase before you hand it an actual editing task.
Natural next steps
> fix the failing test in auth.test.js

> add input validation to the signup form

> refactor this function to reduce duplication
What happens next? Each task triggers Claude reading relevant files, proposing changes, and — depending on your permission mode — either asking for approval or applying them directly.
Finished a coding task with Claude Code? Run your HTML, JavaScript, or Python through our free Advanced Code Optimizer to check for cleaner, more efficient code before deployment.
⚡ Optimize Code Free →Best Practices for Terminal Productivity
A handful of slash commands and shortcuts make day-to-day terminal use noticeably smoother:
- /help — lists available commands and current session info
- /cost — shows token usage and cost for the current session, useful for keeping an eye on usage against your plan’s limits
- /context — shows what’s currently loaded into Claude’s context window
- Esc — interrupts Claude mid-task if it’s heading in the wrong direction, without killing the whole session
- Exiting — type exit or press Ctrl+D to end a session cleanly
Quick tip: if a session feels like it’s lost the thread of what you’re working on, /context is worth checking before you assume something’s wrong — long sessions can accumulate enough history that older instructions get pushed out.
Understanding Claude Code Permission Modes
Permission modes control how much Claude Code does on its own before stopping to ask you — the difference between a cautious assistant that checks in constantly and one that runs unattended.
What Are Permission Modes in Claude Code?
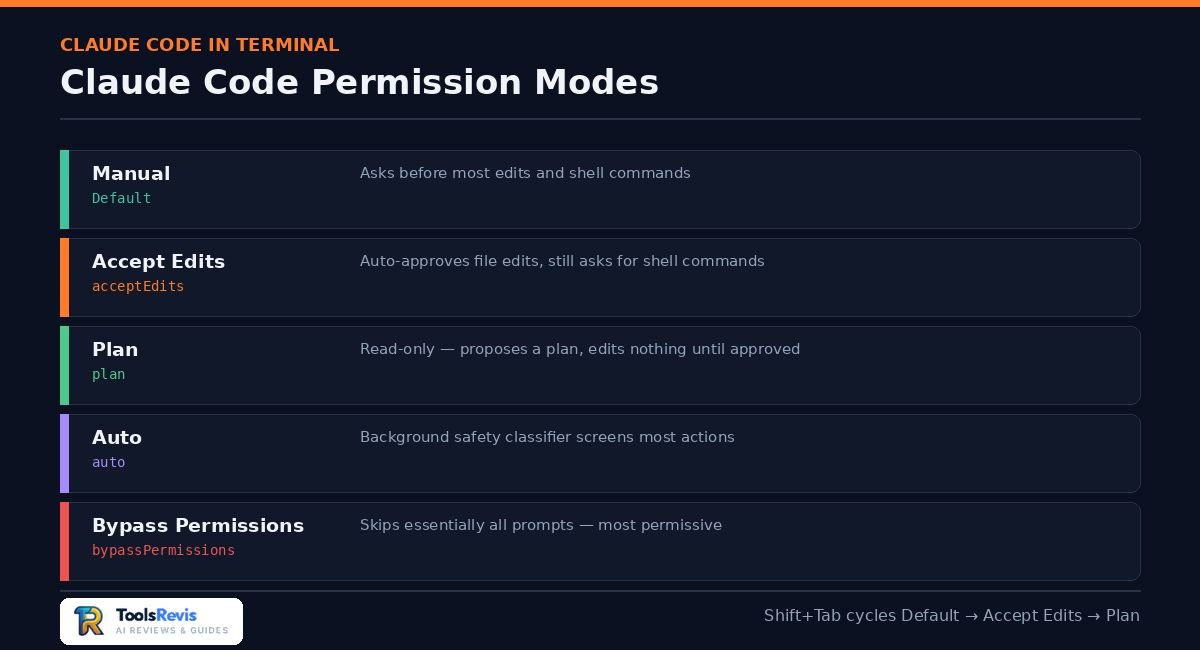
Claude Code supports several permission modes, including Manual, Accept Edits, Plan, Auto, and Bypass Permissions. Available modes can vary by environment, organization settings, and model support.
| Mode | What it does |
| Manual (default) | Asks before most edits and non-read-only shell commands — the conservative baseline |
| Accept Edits (acceptEdits) | Auto-approves file edits without prompting, but still asks before running shell commands |
| Plan (plan) | Read-only — Claude researches and proposes a plan without editing anything until you approve it |
| Auto (auto) | Routes most actions through a background safety classifier instead of prompting you directly, cutting down interruptions while keeping a safety net |
| Bypass Permissions (bypassPermissions) | Skips essentially all prompts — the most permissive mode |
Switch between them mid-session with
Shift+Tab
,
which cycles through
Default → Accept Edits → Plan
(Auto and Bypass join the cycle only when their requirements are met), or set a starting mode from the CLI:
claude --permission-mode acceptEdits
Standard vs Automated Execution Modes
Use Accept Edits when you’re actively reviewing Claude’s work in real time and trust it to make file changes, but still want visibility into shell commands it runs — a reasonable middle ground for day-to-day coding where you’re watching the terminal anyway.
Use Auto mode when you want fewer interruptions but still want a safety net: rather than prompting you for every action, it routes decisions through a background classifier that catches genuinely risky operations while letting routine ones through silently.
Use Bypass Permissions only when you specifically need Claude to run completely unattended — long automated tasks, batch operations — and you’ve already decided the environment can tolerate mistakes without you watching each step.
Recommended Safety Guidelines
Bypass Permissions mode offers no protection against prompt injection or unintended destructive actions, so Anthropic’s own guidance is to restrict it to isolated, disposable environments — containers, VMs, or CI runners — where there’s nothing on the other side of the agent worth protecting, and where a human isn’t expected to be watching in real time anyway.
A few concrete rules worth following:
- Never run Bypass Permissions on a machine with production access, real credentials, or a directory holding customer data
- Treat it as a scoped tool for one task, not a persistent setting — switch back to a stricter mode once the task that justified it is done
- If you need speed without full bypass, Accept Edits plus an allowlist for specific trusted commands is usually a better fit than reaching straight for Bypass
- Remember that bypass mode is about speed, not safety — it removes friction, it doesn’t make the underlying actions safer
Best IDEs to Pair With Claude Code
Claude Code integrates with VS Code and JetBrains IDEs through dedicated extensions that layer editor context on top of the same terminal-based agent — so the “best IDE” question really comes down to which editor you already use daily.
Using Claude Code Alongside VS Code
The official VS Code extension gives you Claude Code without leaving your editor: an inline diff viewer for reviewing proposed changes against your actual open file, quick-launch shortcuts to start a session without switching to a separate terminal window, and automatic sharing of whatever code you’ve selected as context for your next prompt. It also picks up diagnostics VS Code already surfaces — lint errors, type errors — and passes them along automatically rather than making you copy-paste error messages into the chat.
One detail worth flagging from earlier in this guide: the VS Code extension bundles its own private copy of the claude CLI for its chat panel, but that copy isn’t added to your system PATH. If you also want to run claude from a plain terminal, install the standalone CLI separately using the install commands covered earlier.
Add Claude Code to PyCharm (and other JetBrains IDEs)
Claude Code has an official JetBrains plugin that works across the JetBrains family — PyCharm, IntelliJ IDEA, WebStorm, and others built on the same platform. Install it directly from the JetBrains Marketplace inside your IDE:
- Open Settings/Preferences → Plugins
- Search for Claude Code
- Install and restart the IDE when prompted
Once installed, it gives you the same core benefits as the VS Code extension — inline diffs, selection context, diagnostic sharing — adapted to JetBrains’ UI conventions. If you’re a Python developer specifically working in PyCharm, this is generally a better fit than running Claude Code in a separate terminal pane, since you keep diffs and context visible right where you’re already reading code.
Best IDE Choice for Developers
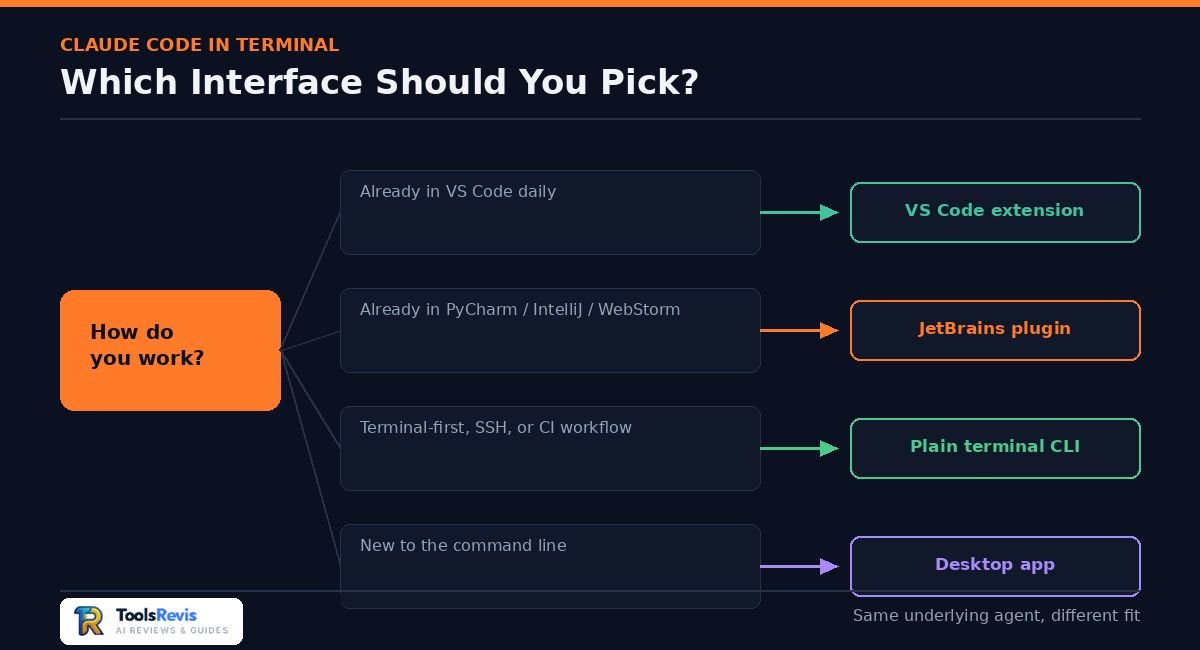
There’s no universally “best” option here — it maps directly to what you already use:
- Already in VS Code daily → use the VS Code extension; the setup overhead is minimal and you get inline diffs immediately
- Already in PyCharm/IntelliJ/WebStorm → use the JetBrains plugin for the same reason
- Working across multiple editors or in a terminal-first workflow (SSH, remote servers, CI) → stick with the plain terminal CLI, since it’s the one interface that doesn’t depend on which editor happens to be installed
- Switching between editor and terminal regularly → keep in mind the session-sync limitation covered earlier — a session started in one won’t show up as active in the other
If you’re weighing an agent-first CLI against an AI-native editor instead of sticking with vanilla VS Code, see how Cursor and Windsurf compare as VS Code forks.
Installing Plugins and Extensibility
Claude Code supports a plugin system that packages skills, custom commands, and connectors together, so you can add capability to your terminal sessions without hand-rolling configuration from scratch.
How to Install a Claude Code Plugin
Plugins are distributed through a marketplace system and installed with a slash command from inside a Claude Code session:
/plugin install plugin-name@marketplace-name
The @marketplace-name part points Claude Code at which plugin registry to pull from — Anthropic maintains an official directory, and teams or third parties can also host their own. Once installed, a plugin can add new slash commands, background skills Claude reaches for automatically when relevant, or connectors to external tools and services, depending on what the plugin bundles.
Run /plugin on its own to see currently installed plugins and browse what’s available, rather than guessing at exact plugin names ahead of time.
Extending Terminal Functionality
A concrete example worth knowing: Claude’s frontend design skill is a real, directly usable plugin example that extends what Claude Code can do for frontend and UI work straight from the terminal — no separate app needed. It’s a useful case study if you want to see what a well-scoped plugin looks like in practice before building or installing others.
Beyond individually installed plugins, you can also extend Claude Code’s behavior through project-level configuration — which is where CLAUDE.md comes in, covered next.
Project Configuration (CLAUDE.md)
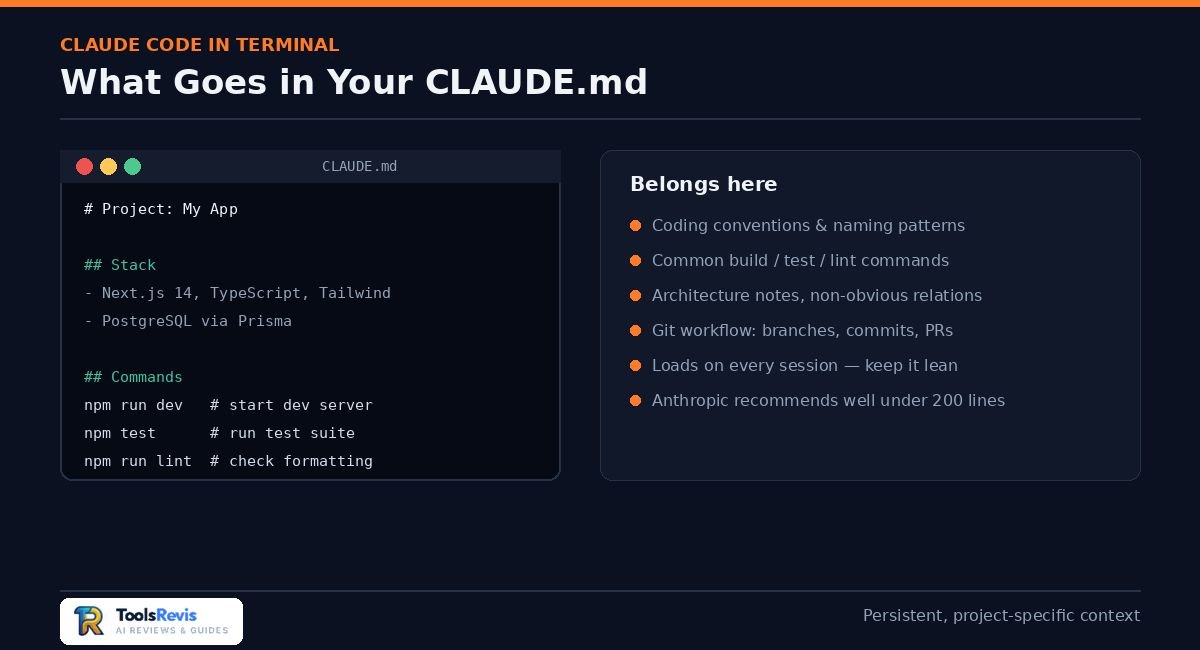
A CLAUDE.md file gives Claude Code persistent, project-specific instructions it reads automatically at the start of every session — the difference between explaining your conventions fresh each time and having Claude already know them.
Creating the CLAUDE.md Configuration File
Create a file named CLAUDE.md
at the root of your project:
touch CLAUDE.md
Claude Code loads this file automatically whenever you start a session inside that project — you don’t need to reference it manually or tell Claude it exists. Anything you put here persists across sessions, unlike context you type into a single conversation, which disappears once that session ends.
CLAUDE.md
is recurring input, so a bloated file quietly adds token overhead to every request.
Anthropic’s own guidance is to keep it lean — well under 200 lines — with specific, verifiable instructions rather than vague guidance.
A minimal starting point
# Project: My App

## Stack
- Next.js 14, TypeScript, Tailwind CSS
- PostgreSQL via Prisma

## Commands
- `npm run dev` — start dev server
- `npm test` — run test suite
- `npm run lint` — check formatting
Defining Project Rules & Git Context
Beyond the basics, CLAUDE.md is where you encode the things Claude can’t reliably infer just by reading your files:
- Coding conventions — naming patterns, preferred libraries, things to avoid (e.g., “never use any in TypeScript,” “always use named exports”)
- Common commands — build, test, lint, and deploy commands specific to your setup, so Claude doesn’t have to guess or search for them
- Architecture notes — how major pieces of the system relate, especially anything non-obvious from the file structure alone
- Git workflow expectations — branch naming conventions, commit message format, whether Claude should create PRs or just commit locally
A good test for whether something belongs in CLAUDE.md: would a new developer joining the project need to be told this on day one? If yes, it’s a strong candidate. If it’s a one-off detail relevant to a single task, it belongs in your prompt for that session instead — not in the persistent file every session pays a token cost to load.
Is Claude Code Free? Pricing for Terminal Access
Claude Code isn’t sold as a separate product with its own price tag — it’s a capability included in Claude’s existing subscription and API plans, and which plan you need depends on how much you use it.
The short answer: no, there’s no free tier. The free Claude.ai plan gives you chat access but explicitly does not include Claude Code — you need at minimum a Pro subscription to use it in the terminal, VS Code, JetBrains, or the desktop app.
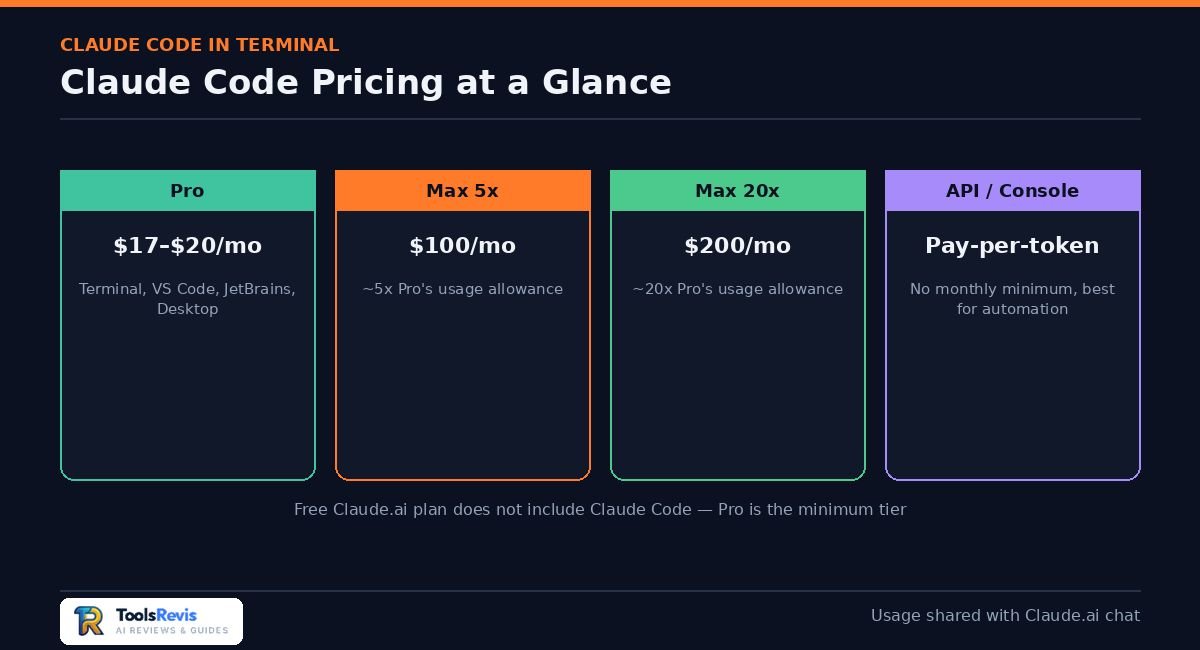
Here’s how the paid tiers break down:
| Plan | Price | What it gets you |
| Pro | $17/mo (billed annually) or $20/mo (monthly) | Claude Code across terminal, VS Code, JetBrains, and Desktop; usage shared with Claude.ai chat |
| Max 5x | $100/mo | ~5x Pro’s usage allowance per session window — for daily, heavier use |
| Max 20x | $200/mo | ~20x Pro’s usage allowance — for near-constant, multi-session work |
| API / Console | Pay-per-token | No monthly minimum; billed at standard API rates, best for automation and variable workloads |
A few practical details worth knowing before you pick a tier:
- Usage is shared, not separate. Claude Code draws from the same usage pool as your regular Claude.ai chat activity on Pro, Max, and Team plans — a heavy morning of chatting can eat into your coding budget later that day, since both count against the same rolling session and weekly limits.
- If you run multiple parallel terminal sessions, you burn through your window faster in rough proportion to how many agents are active at once — the limiting factor is less “how many hours you work” and more “how many sessions you run simultaneously.”
- Watch for a stray ANTHROPIC_API_KEY. If that environment variable is set in your shell, Claude Code uses it and bills you at API rates — silently bypassing your subscription entirely. Run echo $ANTHROPIC_API_KEY to check; if something prints and you meant to use your subscription, unset it.
- Team plans require a minimum of two members. Standard seats cost $25/member/month when billed monthly or $20/member/month when billed annually, and include Claude Code. Premium seats cost $125/member/month when billed monthly or $100/member/month when billed annually and provide higher usage limits for heavier workloads.
If you’re trying to decide between Pro and Max specifically, compare Claude Pro and Max plans in detail for the full breakdown beyond just Claude Code usage.
Frequently Asked Questions (FAQs)
1. How do I launch Claude Code in the terminal?
Install it with the native installer for your OS, then run claude from inside your project directory. It opens an interactive session and, on first run, prompts you to log in through your browser.
2. How do I fix “claude: command not found”?
Open a fresh terminal window — the most common cause is a stale PATH from before the install completed. If that doesn’t fix it, manually add ~/.local/bin (macOS/Linux) or %USERPROFILE%\.local\bin (Windows) to your PATH and reload your shell config.
3. Can I install Claude Code on Ubuntu via Homebrew?
Yes — Homebrew works on Linux (Linuxbrew), including Ubuntu, using the same brew install –cask claude-code command as macOS. That said, the native installer or Anthropic’s signed apt repository are generally a smoother fit for Ubuntu specifically.
4. Why does Claude Code say it’s not available in my country?
This means Anthropic’s IP-based location check placed you outside its supported regions list — it’s a network/account check, not an installation problem. Check your status against the supported countries list linked earlier in this guide.
5. What’s the difference between terminal execution and VS Code?
Both run the same underlying Claude Code agent. VS Code adds an inline diff viewer, selection-context sharing, and automatic diagnostic sharing on top of it; the terminal is lighter weight and works over SSH or in headless environments where an editor isn’t available.
6. Is Claude Code free to use?
No. The free Claude.ai plan does not include Claude Code. You can access Claude Code through Pro or Max subscriptions, Team or Enterprise plans with Claude Code access, or Claude Console/API access billed according to usage. Team Standard and Premium seats both include Claude Code, with Premium providing higher usage limits.
7. Do I need to know how to code to use Claude Code in the terminal?
Not strictly — you interact with it in plain English, and it handles the technical execution. That said, the terminal itself has a learning curve if you’ve never used one; the desktop app is a gentler starting point if you want the same underlying agent without a command line.
8. Can I switch between the terminal and the desktop app without losing my session?
Not seamlessly. Each interface keeps its own separate session list, so a session started in the terminal won’t appear as active if you switch to the desktop app mid-task — you’d need to resume it from within the same interface it started in.
9. Does Claude Code work on Windows without Git installed?
Yes. Git for Windows is optional, not required — without it, Claude Code runs shell commands through PowerShell instead of Git Bash. You’ll only need Git for Windows if you specifically want Git Bash’s Unix-style command compatibility.
Final Summary: Optimizing Your CLI Workflow
Getting Claude Code running smoothly in the terminal comes down to a short, repeatable sequence: install with the native installer for your OS, verify with claude –version, understand permission modes so you know how much autonomy Claude has before it asks you anything, pick the right interface for the task at hand — terminal, VS Code/JetBrains, or desktop — and extend it with plugins and a lean CLAUDE.md once the basics feel comfortable.
The recurring theme across almost every troubleshooting section in this guide is that most “broken install” reports aren’t actually broken — they’re a stale PATH, a mismatched shell (PowerShell command run in CMD or vice versa), or a regional/account check being mistaken for an installation failure. Working through the verification and diagnostic steps here before assuming something’s fundamentally wrong will resolve the large majority of first-time setup issues.
Once you’re comfortable with the basics, the fastest way to get more out of Claude Code is picking the right interface for each task and letting CLAUDE.md carry the context you’d otherwise repeat every session.
Read Next
See the full usage breakdown between Pro and Max, and how much Claude Code allowance each plan actually gets you.
Is Claude Code Open Source?Understand the licensing model — what you can and can’t do with Claude Code, including modification and redistribution.
Best AI Coding Tools for DevelopersSee where Claude Code fits alongside other AI coding assistants in your broader dev toolchain.
Cursor vs Windsurf: AI Coding ComparisonIf you’re weighing an agent-first CLI like Claude Code against an AI-native editor, this comparison is worth a read.

I’m Umair Ahmad, founder of ToolsRevis. I personally test every AI tool we cover — signing up, running real workflows, checking pricing tiers, and comparing outputs — before writing a single word. My goal: cut through AI marketing hype with honest, hands-on verdicts.
Let’s achieve more together!